Pages

Thursday, October 24, 2013

"Happy Days Are Here" - 3 Scrappy Boys kit

Today I am sharing the second layout I created with my first 3 Scrappy Boys kit.  I received the October Main Kit which can be found here.  I shared the first layout on the 3 Scrappy Boys blog earlier this week.  Heather has some great deals on some of the older kits right now, so be sure to check out the kit section of the store.

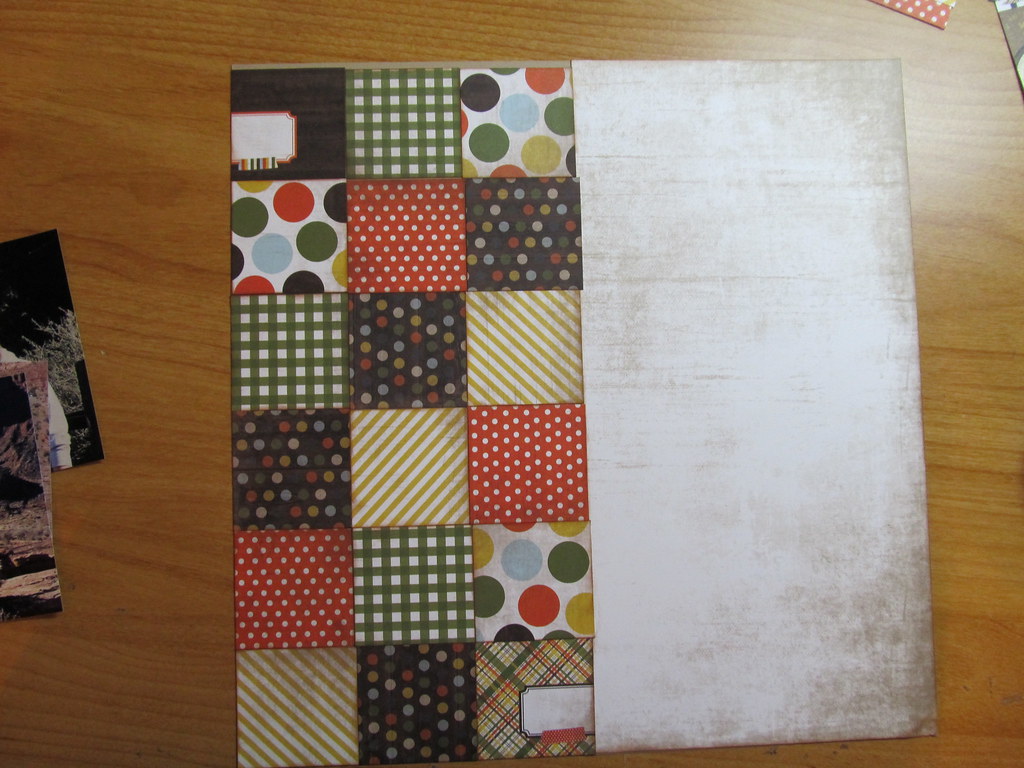
The October Main kit included a 12x12 sheet of transparency overlays that were in 4x6 and 3x4 sizes.  I knew as soon as I saw this, that I wanted to make a divided page.  Especially since I knew I would be using lots of scraps in order to use my kit to it's fullest potential.

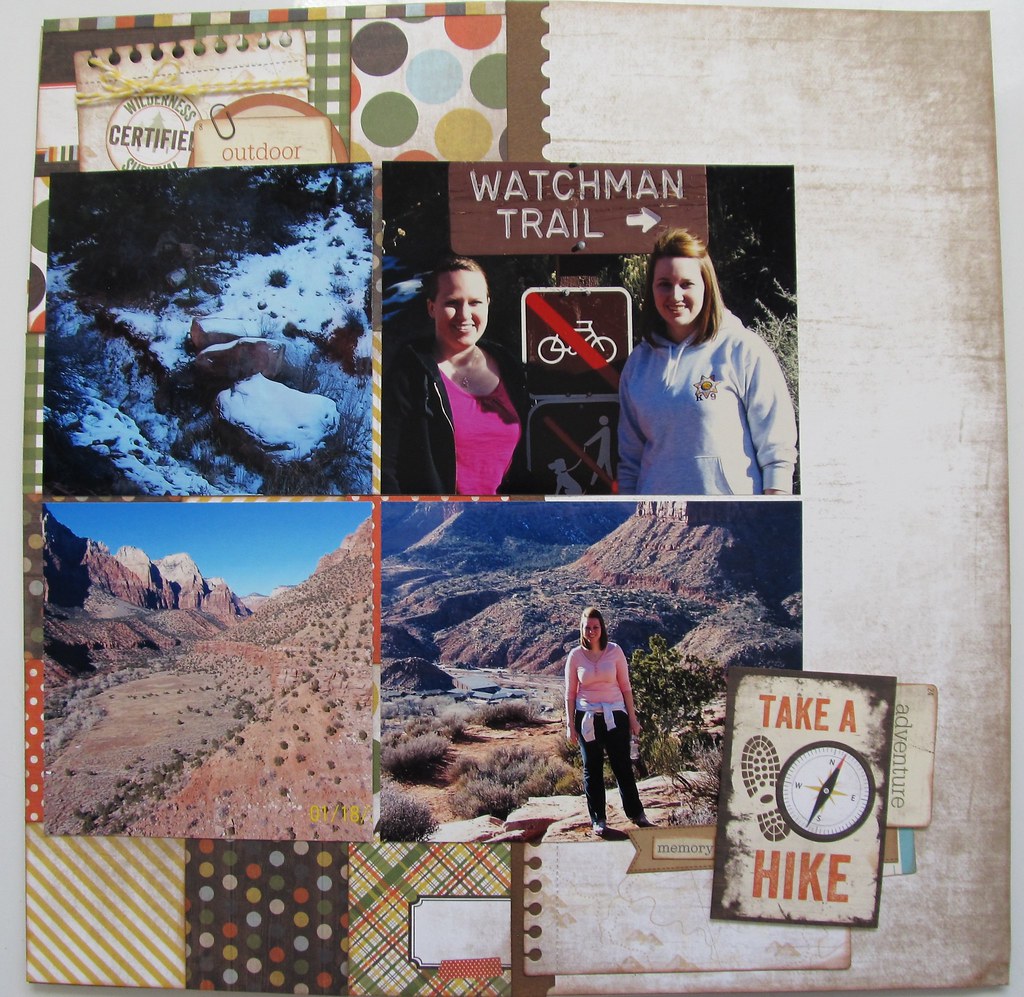
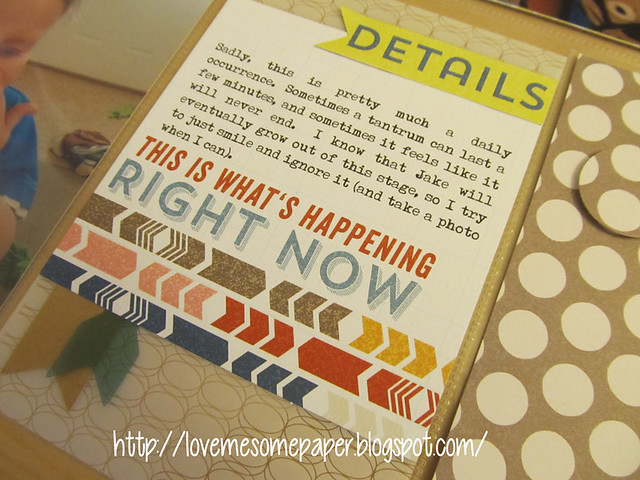
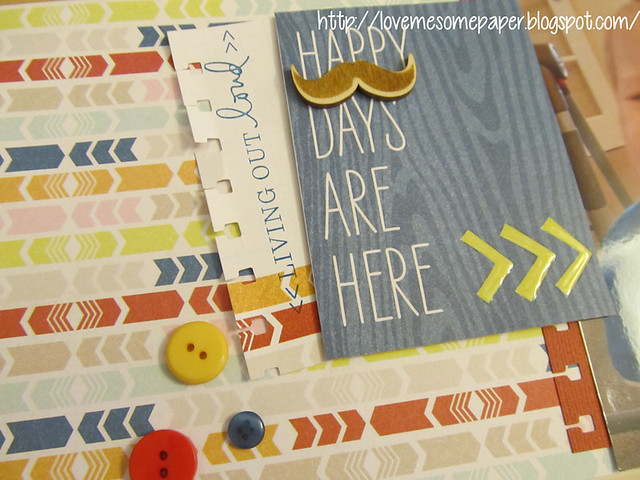
Meet Jake.  Next month he be 2 and HALF years old.  From 18 months on, he's pretty much been like this daily when he doesn't get what he wants, wakes up, the day end's in a "y", etc....  So the little 3x4 card that says "Happy Days are Here" from the My Mind's Eye Cut & Paste collection made me giggle.  And I thought it went really well with the 6x4 card that I used on the journaling that says "This is what's happening right now".  I'm all about the nitty gritty in my scrappbooking.  We aren't always happy and smiling each and every day.  Plus, I think my little man is still pretty cute even when he thinks his world has ended because I said "How was your nap?"


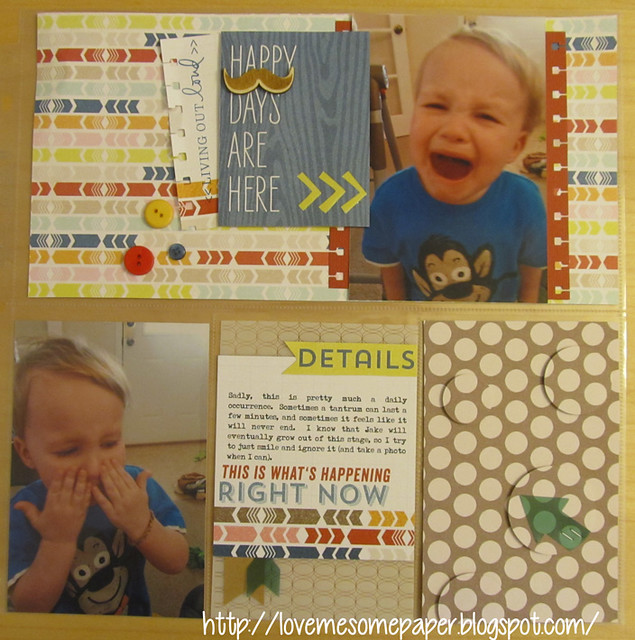
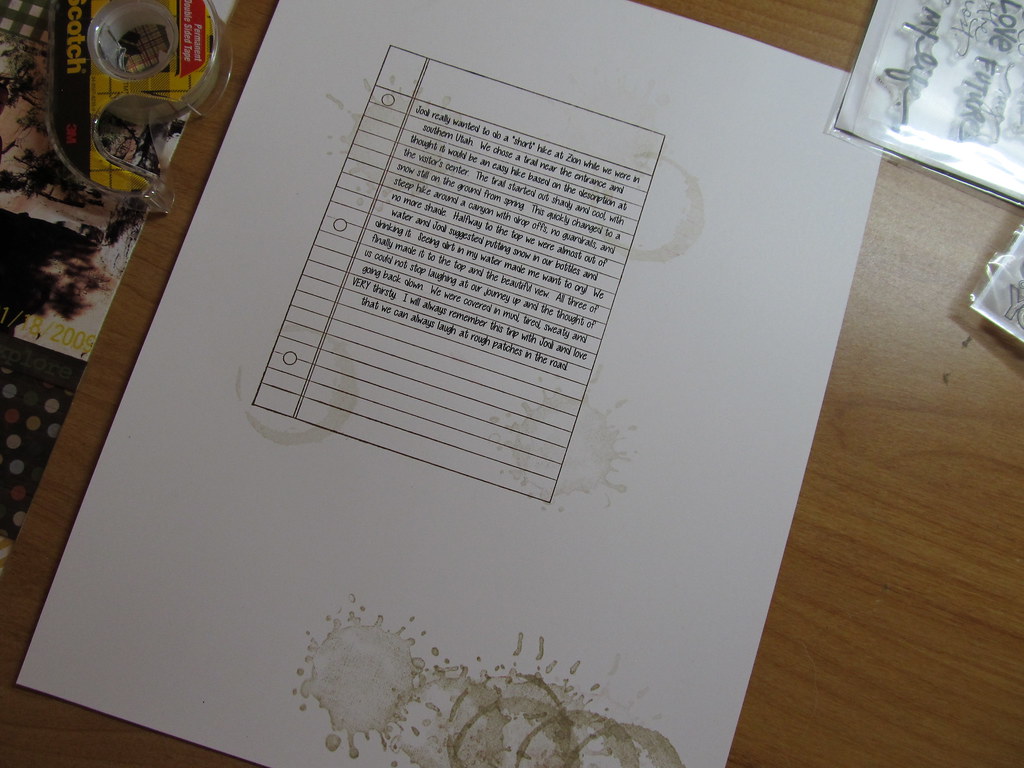
Here is the 6x4 card I mentioned above.  I just trimmed it down to 4 inches wide and used the remaining 2 inch section I cut off to tuck behind the 3x4 card at the top of the layout after I used a notebook border punch on it.  I then ran the card through my printer to add my journaling, attached it to a 4x6 overlay, tucked a couple of the Studio Calico transparent arrows under the card, and the "Details" pennant is actually cut from one of the other 3x4 My Mind's Eye cards.

I added a cute little wooden mustache (also from the kit) to the journal card, stamped on the scrap piece with a Technique Tuesday/Ali Edwards stamp, and added some glossy accents to the chevrons on the card.  I also used the same border punch on some scrap cardstock and framed my photo with it.  


For the last section, I just took a scrap of pattern paper and cut it down to 4x6 then punched some different sized circles and popped them up with foam tape and lined up the patterns.  One of the circles has another clear arrow stapled with the Tiny Attacher for added interest. 


So far I am having a lot of fun with this kit, and this is my FIRST time scrapping with a kit like this.  It's a challenge to make things work, but I think a challenge every now and then helps motivate myself.  The only things from my personal stashed I used are the buttons, the staples, and the stamps/ink.  EVERYTHING else is from that one kit!  

Thanks for stopping by!
Nicole


Sunday, October 13, 2013

Exciting News!!!!

Hi all!

I'm a little late in haring this news, but I've been super busy in scrappy life and real life.


I applied for a Design Team position with 3 Scrappy Boys kit club and I was SELECTED!!!  I'm so excited!  I've never scrapped with a kit and I know how popular they are.  I think it will be a fun challenge every month to create pages, cards and other items using ONLY the supplies in the kits I receive.  I'm so used to picking exactly what I want and love that this will definitely push my creative boundaries. 

I love how friendly the other design team members are and the forums on the site are very positive.  Take a peek at the forums and the store and blog.  Heather has done a great job with the store and I'm loving what I've seen from the other design team members so far.  Makes me wonder what Heather was thinking when she picked ME! 

I'll be back in the next day or two with more of my assignments from the Allison Davis 6x6 class.

Thanks for stopping by!
Nicole

Tuesday, October 1, 2013

- Allison Davis 6x6 class

Okay here's my take on the #5 sketch from the 6x6 class:

Left side:

Right side:


The sketch called for the 2x2 squares only on the left page.  I only had the one sheet of 12x12 paper that matched the pad I was using, from the Take a Hike collection from Simple Stories.  So I cut that in half and used one half on each pages, and filled in the middle area with all the 2x2 squares from the paper pad.  A couple of the square are actually from the cut apart pages and I like the added detail it gives.

Let me show you a bit of my process since I remembered to take a few photos as I went along this time.

Here you can see when I decided to cover the right side with the little squares as well.  And you see that my squares are not neatly lined up where they meat the 12x6 piece of paper.  To hide this I just punched a border with some brown Bo Bunny Double Dot paper (I'm addicted to this stuff).  You can also see a gap at the very top of the squares.  Turns out my cardstock I was using was a tiny bit taller than 12 inches.  I ended up just trimming a tiny strip from the stripe pattern and covering it with that.  I wasn't concerned about it because I was planning on using some larger element clustered up there.


I really enjoy using computer printed journaling.  I do not like my own handwriting and typing it out allows me to think about what I want to say and I have been known to change it a few times prior to printing.  With this page I really wanted to use a new (to me) background stamp from Hero Arts that is a little notebook page.  I tried to print the journaling in my usual way - print it out on paper, align die cut ontop and tape it down, then print again.  I did this THREE times and messed up everyone single one.  I ended up just printing in on a full sheet of cardstock and using my stamp-a-ma-jig to line up the stamp.  And before I cut the stamped image out, I used some coffee stain stamps to add some interest to the notebook paper.
And here's a tip if you are like me and keep forgetting to buy a stamp press - the notebook paper stamp comes as a cling stamp and my blocks were too small.  So I just used a wood mounted background stamp as a block.

Here's some detail photos:

Thanks for stopping by!!
Nicole