
Today the newsletter for 3 Scrappy Boys went out. If you haven't already signed up, be sure to here - scroll all the way to the bottom of the main page. Each month on the 15th Lanette sends out the newsletter packed full of inspiration, reveals, challenges and sometimes sale information. I have some tips for creating two page layouts in this months newsletter.
For November's newsletter, I created a 2 page layout using my November kit - which is actually store product in the form of the March Main kit - LOVE this kit.

Because I loved so many of the patterns in this kit and wanted to use a bunch, I chose to just trim them into strips and sort of block my photo templates in. I used the same photo template from Keri Bradford on both pages, I just flipped one of the upside down. If you look closely in the following photos, you can see how I fixed a goof. I spilled the tiniest drop of water on one of the my photos and I really didn't want to rip up the collage and have to reprint the whole thing. Instead, I picked three other photos and reprinted those four and layered them on top of the collage and roughed up the corners with my fingers so you could see the added layers a little better.

I layered a kraft die cut and piece of pattern paper from the kit, with a scrap of vellum from my stash and die cuts I cut with my Cameo with papers from the kit and then added some of the Basic Grey enamel dots, also from the kit. The yellow and white striped strip is actually the Maya Road adhesive ribbon that was in the kit - I chose to leave the wax paper backing on the ribbon and just attach it with glue dots. This made the white sections of the ribbon remain white.
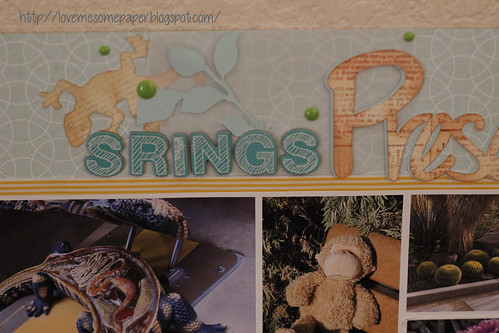
Thickers from the kit (love!) mixed in with die cuts from my Cameo and papers from the kit, another scrap of vellum from my stash and more of those Basic Grey enamel dots. For the "Preserve" portion of my title, I cut two layers with my Cameo - one in the pretty blue cardstock from the kit, and another out of some cream I had in my stash. I used a Hero Arts newsprint stamp on the vanilla layer and inked it with some Tim Holtz distress inks. I did the same thing to the little lizard die cut.
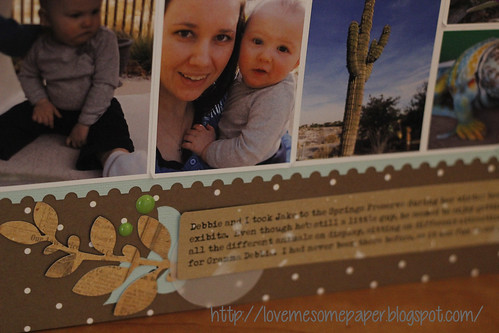
I chose some kraft cardstock in my stash to print my journaling on, and then layered some more of my DIY die cut pieces from the kit papers. I also tried to splatter some white Mr Huey ink on the journaling...ya, I need some more practice with that. And you can see in the photo of myself and my DS the addition layer of some of the photos.
Thanks for stopping by and don't forget to go sign up for the 3 Scrappy Boys newsletter!
Nicole
Your layout is really beautiful and inspiring, I love that you scrapped lots of photos in a double pager, everything matches so well... I am following you !
ReplyDelete